Category Archives: tips & tricks

Photographing Your Work

Distracting Background

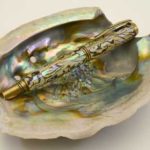
I’ve served as a juror for high end craft shows for many years. One issue that always stands out is how people photograph their work.  Some people have elaborate sets, props and backgrounds, and the piece that they are trying to photograph gets lost in the background.  They feel that the “artsier” the image the better, when a plain image is sometimes better.  I am no expert by any means, however, when you can see the work clearly then you are ahead of the game.  Below you will find some general guidelines to help you obtain the image you want so your acceptance into a “Pen Contest” or a juried craft show gets easier for you.
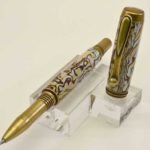
Clean Background & In Focus
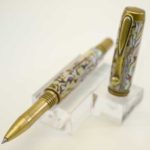
Out of Focus

First and foremost, make sure your piece is in focus!  If you are using a digital SLR camera do not use the auto setting.  Use the aperture setting (lens opening) on your camera and set it as high as you can (f16 or f22) to get the most depth of field (focus) as you can.  This will assure your photo will be in focus from the front to the back.  A tripod is helpful to hold your camera to steady the image. Please consult your camera’s manual for exactly how to use it manually.

Lighting is very important.  A dark picture cannot show the detail in the work.  Natural sunlight is best
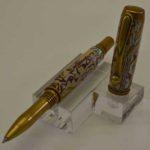
Dark Image

but it can give you very harsh shadows.  Use a light tent and light the image from three sides, (top, and left & right sides).  By lighting from three sides, you soften any shadows you may get. The light cancels out the shadows.  Using one source of light will usually produce harsh shadows.

Use a plain background.  You want your pen to be the main focus not what you are using as a background. I personally like using a clear pen stand to photograph my pens. If you do not use a stand for your photograph, and you just lay it on your background, your pen will tend to roll and not lay the way you want it to.  Use some tacky putty, museum wax or a tiny piece of scotch tape rolled up and stuck to the back of the pen.  This will allow you to position the pen in the way you want.

Although a digital SLR will probably give the best results, you can still get very good results using a phone or tablet that have a good camera. There are many photography apps available that can help with aperture & focus. Do not use any built-in filters, they won’t make your photo any better. There are attachments for phones & tablets that will allow you to use a tripod to keep it steady for a sharp photo.

So, lighting, focus and a plain background will work most of the time especially, if you are trying to win a “Pen Contest” – get the hint!  Good luck and happy picture taking!

How To Get Started Selling Your Handmade Pens

Marketing Your Pen Making Work,
Part 1: 
Table Money Products

It is the fall craft show season! Time to get busy turning some pens!

I am asked, almost daily, “How can I get started selling my pen turning work?”
My first question back to that individual is “Where do you want to sell your work?”
The typical answer is usually “I don’t know”.

This is the first step.

There is no simple step-by-step guide to follow, if there was then everybody would already be selling their work, and no one would ask me for the answers!

So here are some basic questions & answers:

How do I find craft shows or fairs for selling my handmade wood pens?

Your best resource is the internet. Just type “local street fairs” into Google, and hundreds of thousands of responses came back in under a second! Then you can narrow it down to find the local shows and fairs in your area. Just add your state, town, or county to the search.

For argument sake, let’s break the types of shows down to three groups:

Group 1 – For lack of a better term we’ll call these “street fairs, local bazaars or church fairs.” These are inexpensive to get into, non-juried shows. 

Group 2 – juried shows, medium size, local or regional

Group 3 – juried show, high end. These can be regionally or nationally well known, and established shows. 

We will be discussing these 3 types of shows over the next few blog posts.

Group 1: Local Street Fairs, Local Bazaars or Church Fairs.

This is where you see the fair advertised in the local paper, with flyers at local stores, local social media, or someone tells you about it. Inquire about one of these shows and they will tell you that a six foot table will cost anywhere from $10 to $125 per table. These types of fairs are not juried, so you do not have to submit images of your work to get into the show. These shows do not charge the public to attend. It’s usually a first come, first served type of selection for the vendors. You could be competing with too many other pen makers, or be stuck between the Kettle Korn vendor and the guy selling CDs of his own, very loud, tuba songs. It may be difficult to determine how well you will do at the show, but it is a good way to start.
HINT: I do not go to a show strictly on the word of the promoter, their job is to sell tables or spaces and they do not care what goes on that table as long as they get YOUR money! Sometimes a promoter will brag about how many thousands of people will attend, and they will sell you on that idea. Many factors contribute to how well a show is attended, and if it is attended by buyers, and not just lookers. If you are not selling your pens just yet, go to as many of these shows as possible as a “customer”. You can get a good feel for the show this way, and know the shows you want to sell at when you are ready.

So you have paid the entrance fee, now what?

For this type of show, chances are you will not see the serious pen aficionado, so I would not have a lot of high end fountain pens there selling for hundreds of dollars. For these types of venues, I would suggest pens in the retail range of $25 to $50, say Slimline pens and single barrel pens such as the Sierra or Gatsby. It is always a good idea to have a few higher end pens there, say in the range of $75-$90 and these pens would be like a Baron or Tycoon made as a rollerball pen. You never know who will show up at one of these shows, so have the higher end pens to show off your talent & skills. They will be the “eye candy” of your table.

At these types of venues, Table Money items such as key rings, small styluses and other non-pen items like bottle openers and pizza cutters are always good for the money that will at least pay for the entrance fee. Have these items visible where your customers will check out so they can clearly see them, and purchase them, almost as am impulse item. These items are made from scrap material, they easy and quick to make, and sell for around $15. That’s what “table money” items are. You can pay for your entrance fee with just a few of these products being sold, so always have several types of small things for sale at your checkout station.

How do you display your items?

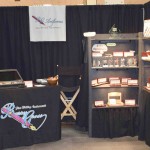
booth-empty-FBIt is very important to display your items so your customers can see them clearly. Please, don’t just throw a drape over the table and open up a carry case with your pens in it! Put some thought into how you will display your work. You want to have your pens at eye level if possible. Have some sort of a step arrangement to place acrylic stands or pen boxes on the steps to elevate them off the table. It can be as simple as stacking some sturdy and attractive cardboard, wood or acrylic boxes to give you several levels of interest on your display. Local craft stores have many items that can be used for display purposes. Look at jewelry display trees for hanging up key rings, small styli, and other small colorful items for sale. These are just a few ideas to get you started for a successful show.
The next time we will discuss mid-level shows, and some of the items to bring to that type of show.

To get you started, we have put some “Table Money” products, and booth display stands on sale at 10% off. Hurry these are only on sale until Monday October 24!

click here to go shopping


Happy Turning,

Barry-Signature

Tax or not to Tax?

A question I get asked a lot is “Do I have to collect sales tax at every craft show I attend?”

The answer is YES!

Every state where I attend an art or craft show requires that I collect sales tax, and then pay the tax to the state.  Each state has it’s own rules, some require that you get a sales tax number to collect the tax, and others simply send you a form and you report how much gross sales you had, and then you pay the appropriate sales tax.  If a particular state requires that you get a sales tax  number, they may require you to file quarterly or semi-annual sales reports, even if you did not have any sales for that particular time period.  This can be a daunting task especially if you do a lot of shows in many different states.  If you have any questions about this, check with the promoter of the show, and they will be able to answer your questions about collecting taxes.  Many promoter give the attendees names to the state so they can make sure that taxes are being collected!

It is not worth the fine if you get caught, so do the right thing and collect the tax and pay it!


Blanks Blowing Up? A Possible Gluing Problem

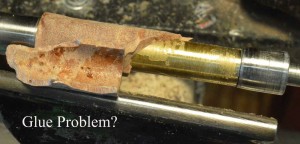
Glue Problem?

Do you have a Glue Problem?

I get calls every week from pen makers who ask why their pen blanks are blowing up. I ask them about when they blow up. They tell me it’s either when they first start to rough turn them, or when they are just getting to the end, right before they start to sand, is when they usually blow apart.

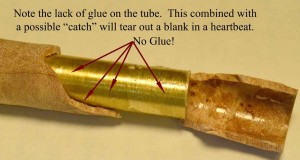
Glue not applied thoroughly

Glue not applied throughly

My answer to them takes a little bit of a different approach. I ask them what type of glue they use to glue the pen tube in, and then they ask me why I am asking them that question. My response is, if there is not enough glue on the pen tube, and you do catch it with your tool, it can rip the material right off the pen tube as illustrated above.

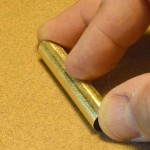
Roughen up with 100 grit sandpaper

Roughen up with 100 grit sandpaper

Try these steps to get a better result, and prevent a blowout.

  1. Make sure that the pen tube is roughed up. Use 100 grit sandpaper so your glue has something to grab on to.
  2. Place the medium CA glue on the pen tube and cover it completely. Not so much that it is dripping all over the place, but make sure you have enough to coat the whole tube.
  3. Insert the tube in one end of the pen blank. Move it in and out of the pen blank a few times to distribute the glue along the blank.
  4. Turn the pen blank around, and repeat the procedure until the inside of the pen tube “looks wet”, and you are sure that the entire length of the pen tube has a nice, even coating of glue.
  5. Place the pen tube inside the pen blank once more and let it dry thoroughly.
  6. Turn it, and enjoy a blowout-free experience

Try this technique and it may save you from a major repair one day!

Happy Turning!

Barry-Signature